S: This week we’re jumping to another Jamie Oliver cookbook: Jamie Oliver’s Comfort Food. We’re sticking to dinner foods, as we’re craving some din din. We also decided to test his theory on how long it would take to make this recipe, as nobody that we know, believes it’ll take only one hour and forty minutes. They expected much longer, and they were most definitely correct. [D: 1 hour 40 my ass, maybe if you’re Flash, or Superman]
[Serves 2]
Ingredients:
Dough
2 large eggs
1 3/4 cups sour cream [D: most of this is going into the sour cream sauce to serve, not the dough, misleading a bit]
2 1/2 cups all-purpose flour, plus extra for dusting
Time the cookbook says it’ll take: 1 hour 40 minutes [D: Lies!]
Actual time it took to cook: 4ish hours
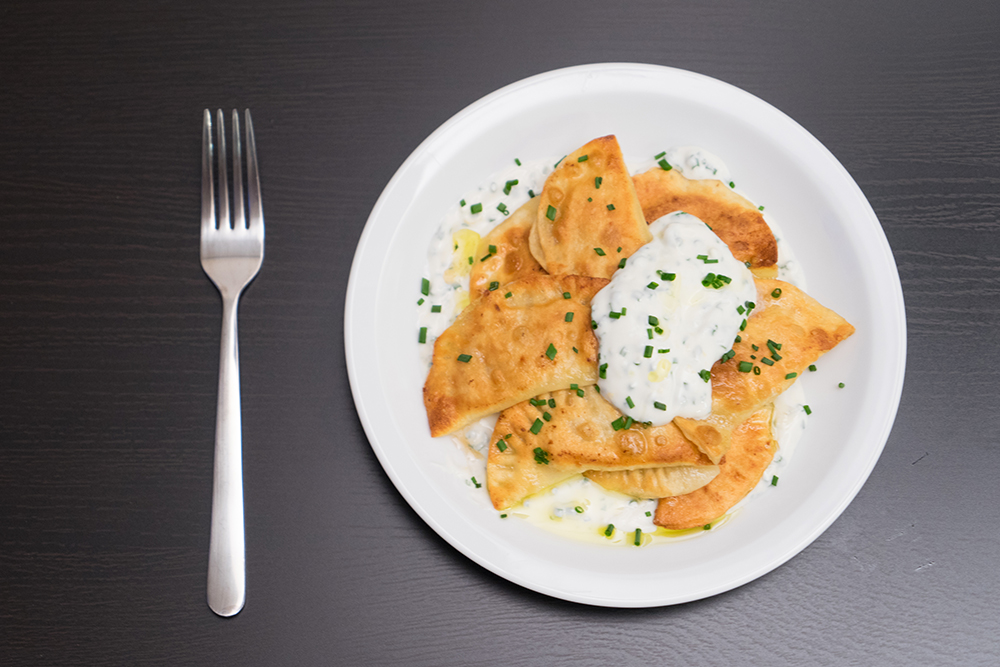
Verdict: I really liked this recipe. As the cookbook says, this recipe isn’t your typical pierogi you’re thinking of: filled with cheese and potatoes. This recipe dates back to the 13th century… so it has to be good, right? The thing I don’t like about it? How long it took. I mean I know I’ve heard horror stories of how long it should take, but this recipe had me hoping it would take less time. That part made me sad, but the end result was yummy nonetheless.
The Step-by-Step:
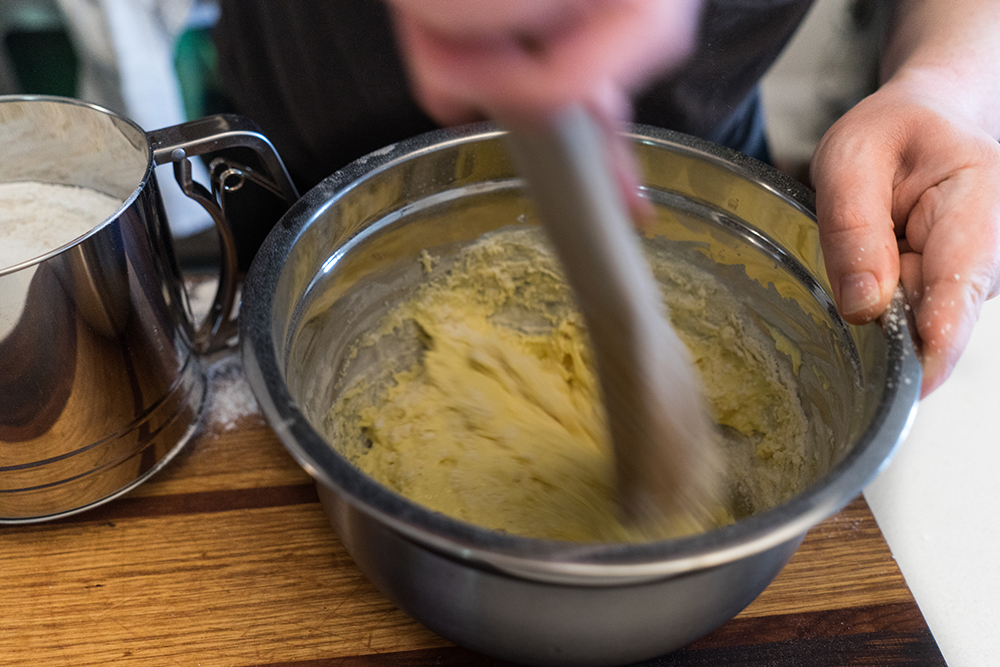
Step 1: Making the Dough
- beat the 2 egss with 2/3 of the sour cream in a big bowl
- once smooth, sift in the flour, baking powder, and 1/2 tsp of sea salt
- mix the dough until it comes together
- plop the dough onto a floured surface and knead until smooth
- wrap the smooth dough ball in plastic wrap and put it in the fridge
Step 2: Pierogi Filling
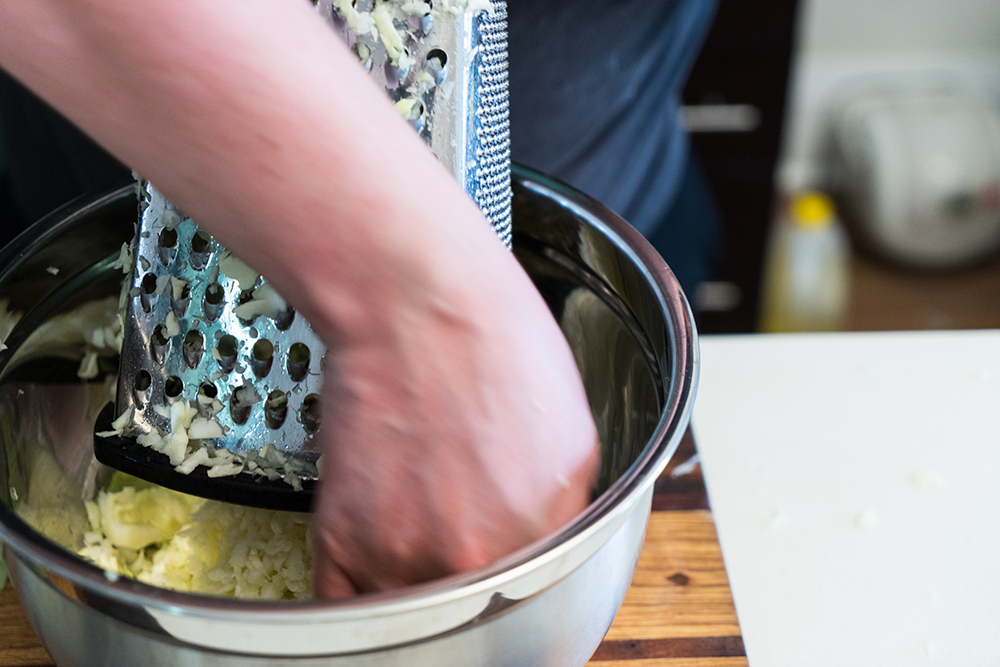
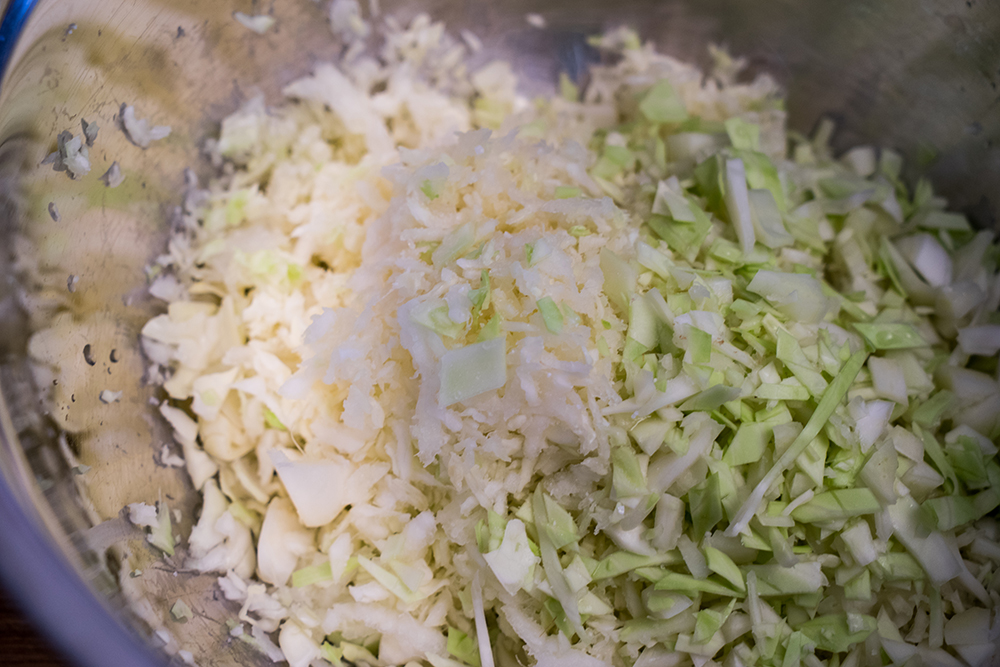
- coarsely grate cabbage into a bowl (we rinsed out the dough bowl and re-used it)
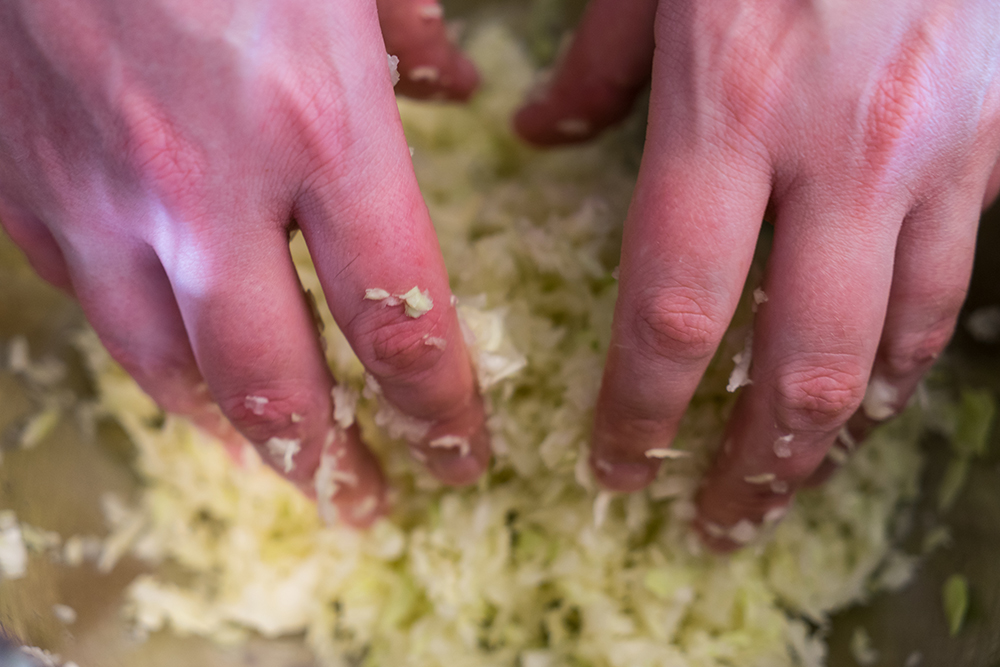
- scrunch and toss with vinegar and a pinch of salt, leaving it to lightly pickle.
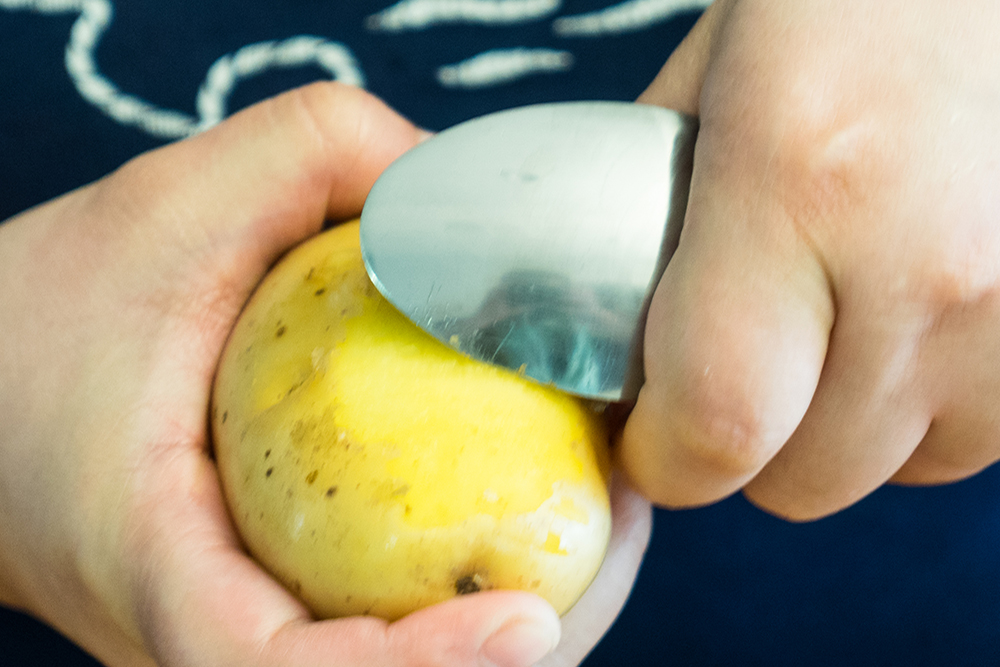
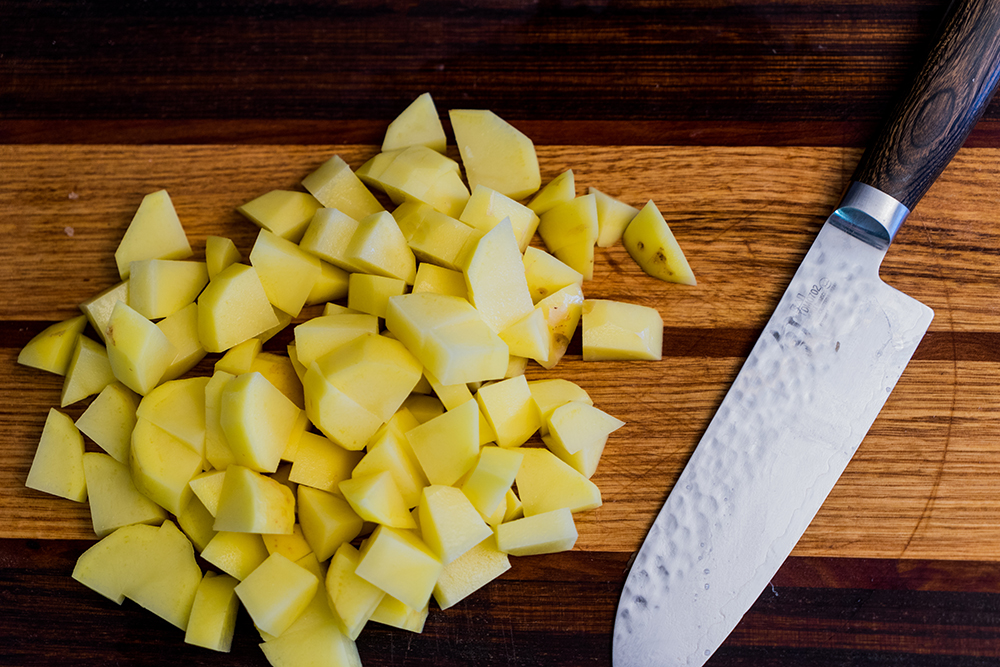
- peel the potatoes, roughly chop, and cook in a saucepan of boiling salted water for 10 to 12 minutes (or until tender)
- drain and steam dry (We then broke the recipe rule and went and mashed it in anticipation of mixing it with the rest of the filling ingredients)
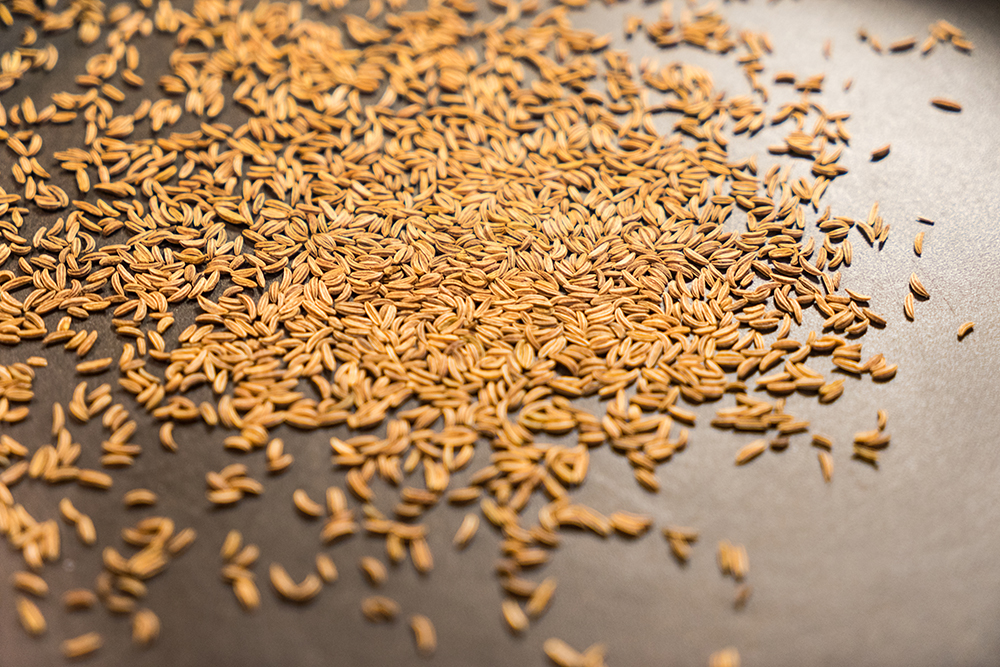
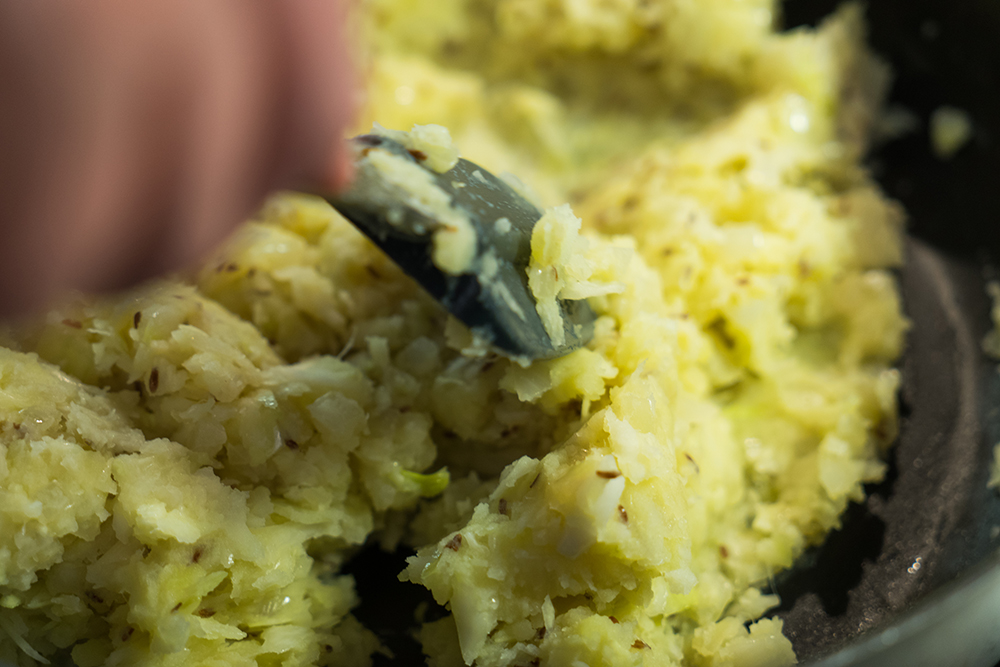
- put caraway seeds in a cold frying pan, then put it on a medium-low heat stove, and toast for a few minutes
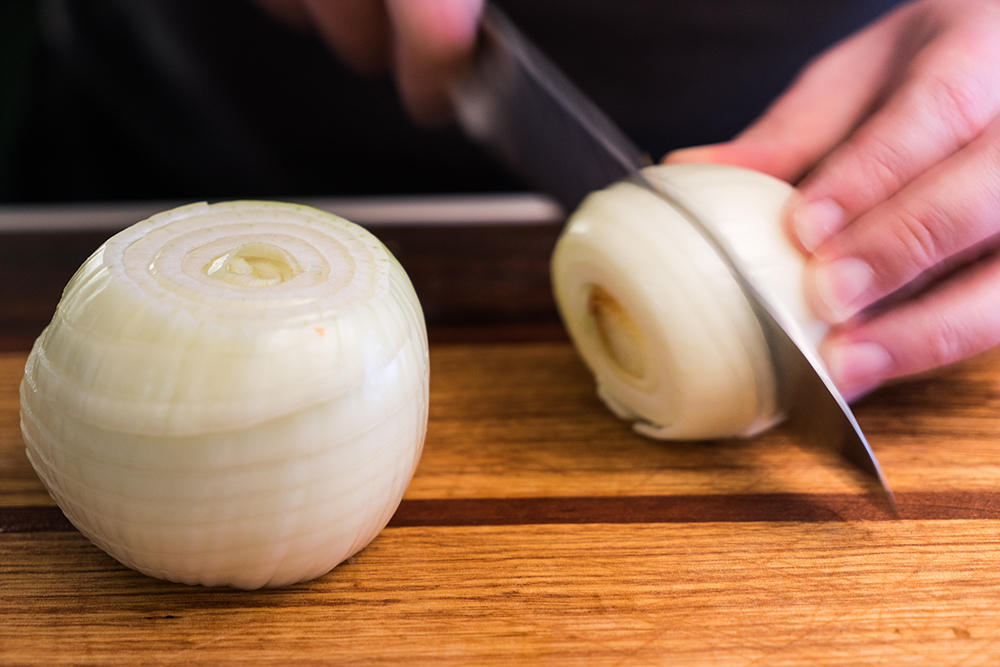
- while toasting the caraway seeds, peel and finely chop the onions
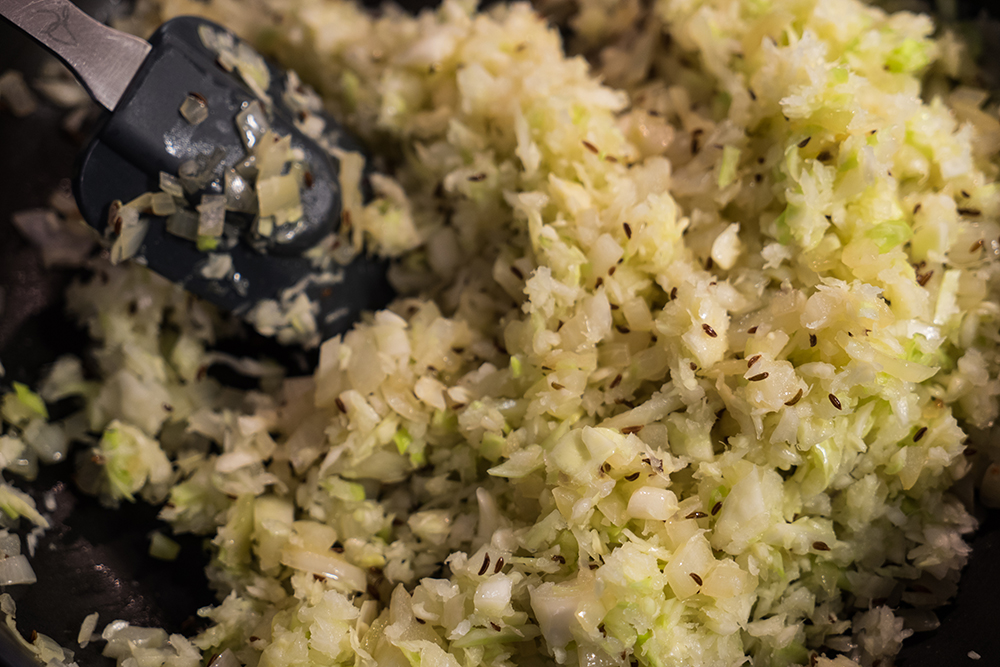
- add the chopped onions to the toasted caraway seeds in the frying pan, adding a glug of oil [D: 1TBsp or so] into the mix
- cook for 5 to 8 minutes, until lightly golden, stirring occasionally
- after 5 to 8 minutes, add in the cabbage and a pat of butter and cook for 5 minutes
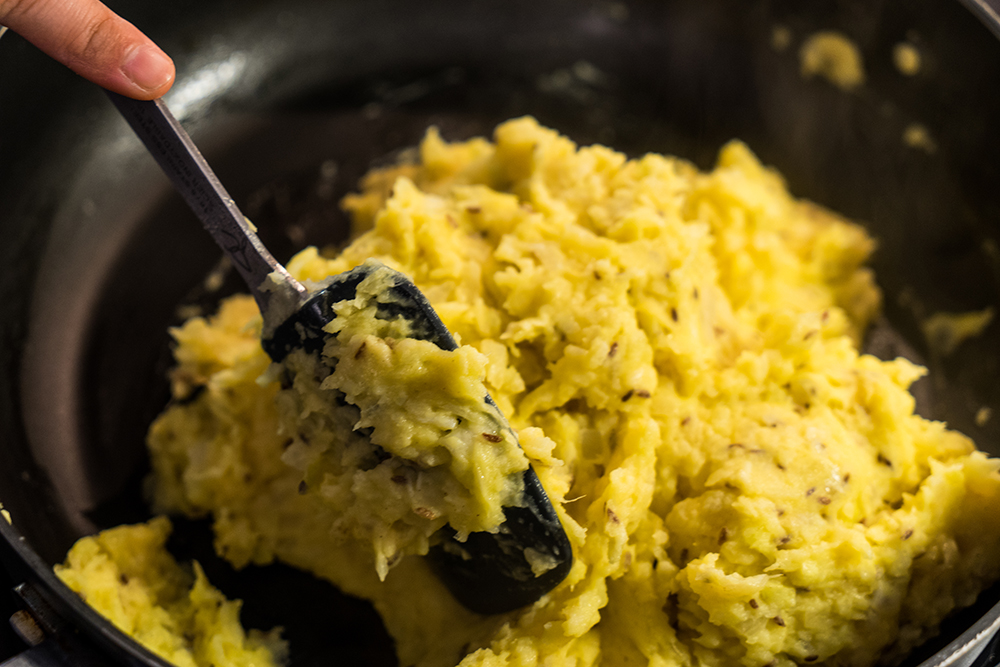
- after 5 minutes, add the previously mashed potatoes to the mixture and mash it all together to make it one cohesive mass of filling
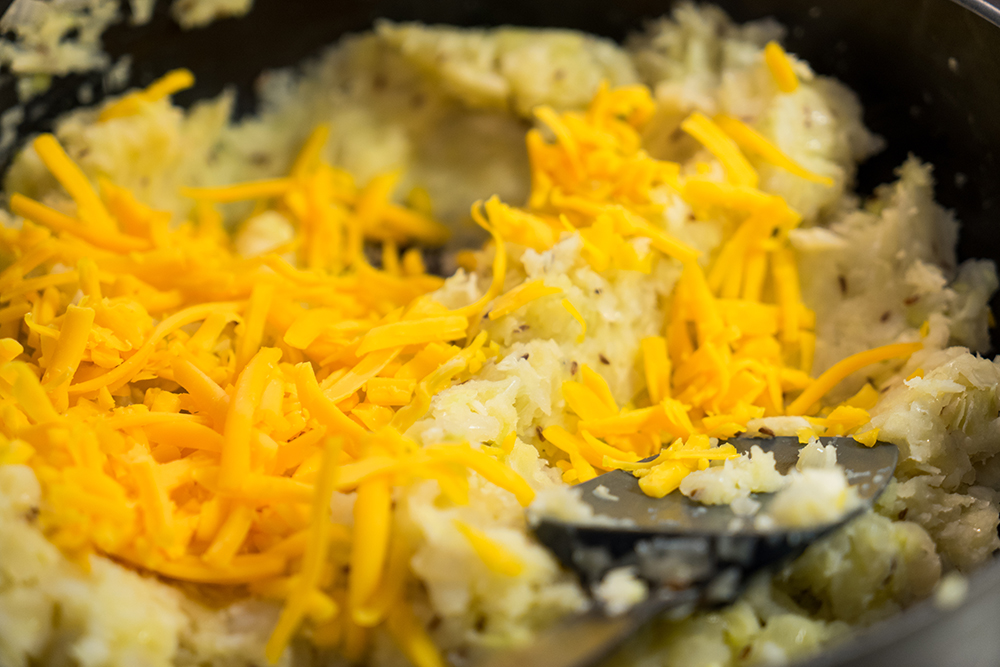
- coarsely grate in the cheese to the mass [D: mass of filling sounds so appetizing], and add a generous pinch of white pepper, mixing well to distribute the flavours
- take the filling in the pan off the stove top to cool down for easier manipulation when making the pierogi
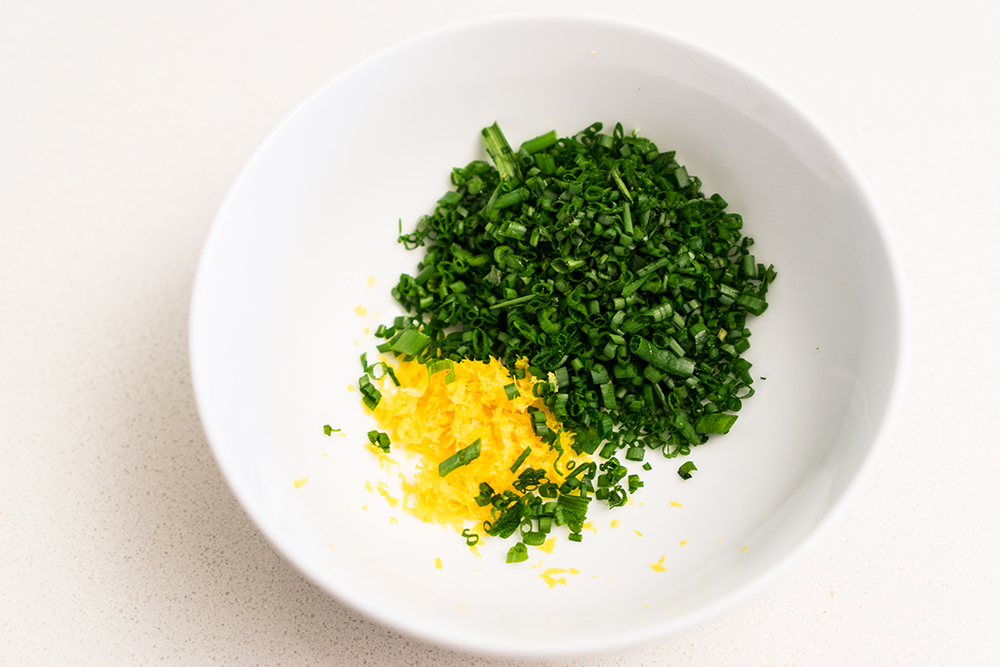
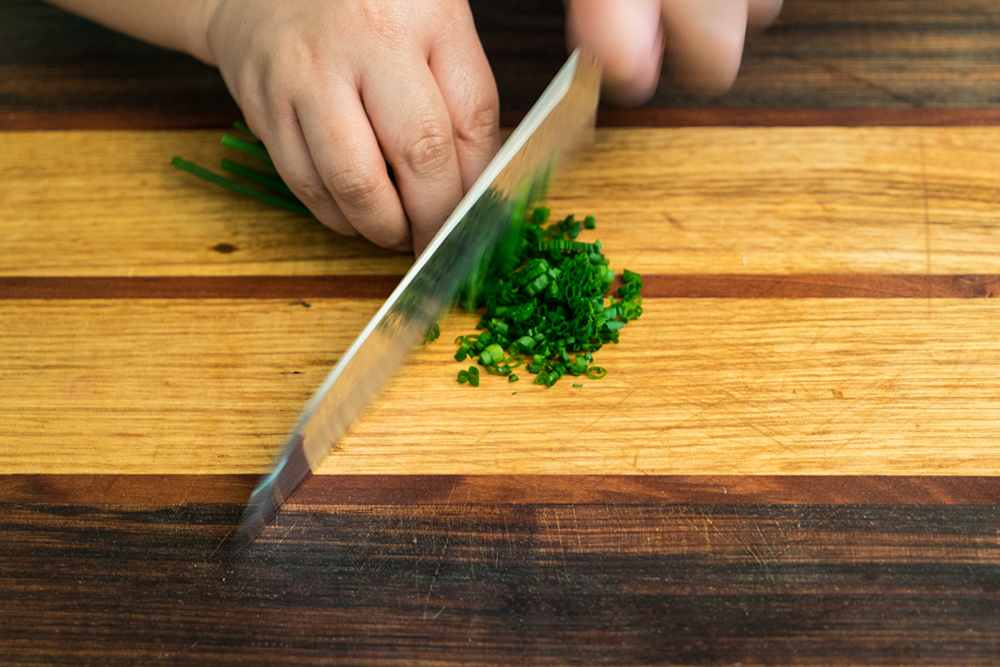
Step 3: Chive Sour Cream Sauce
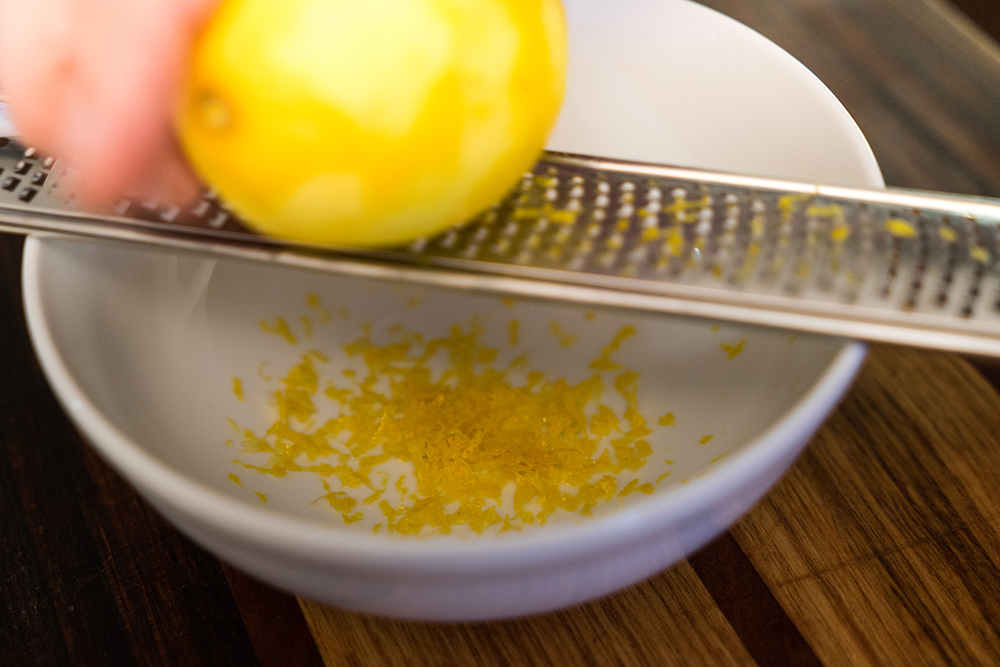
- finely chop chives into a small bowl with the remaining sour cream
- add the lemon zest and juice to the bowl and mix all the ingredients together well
- season with SP to your preference, then set it aside in the fridge until ready to serve
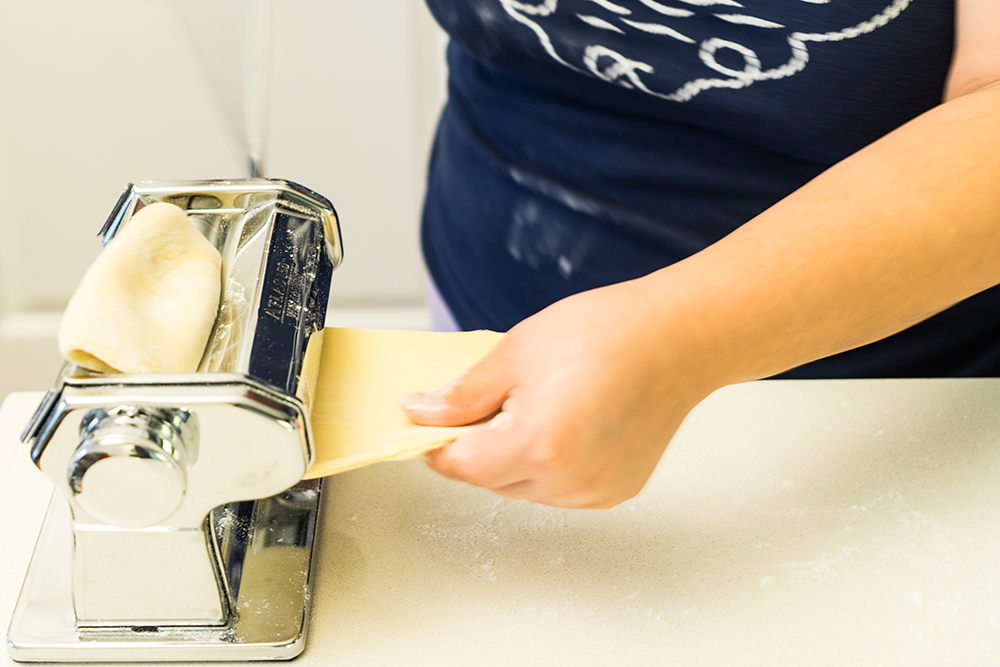
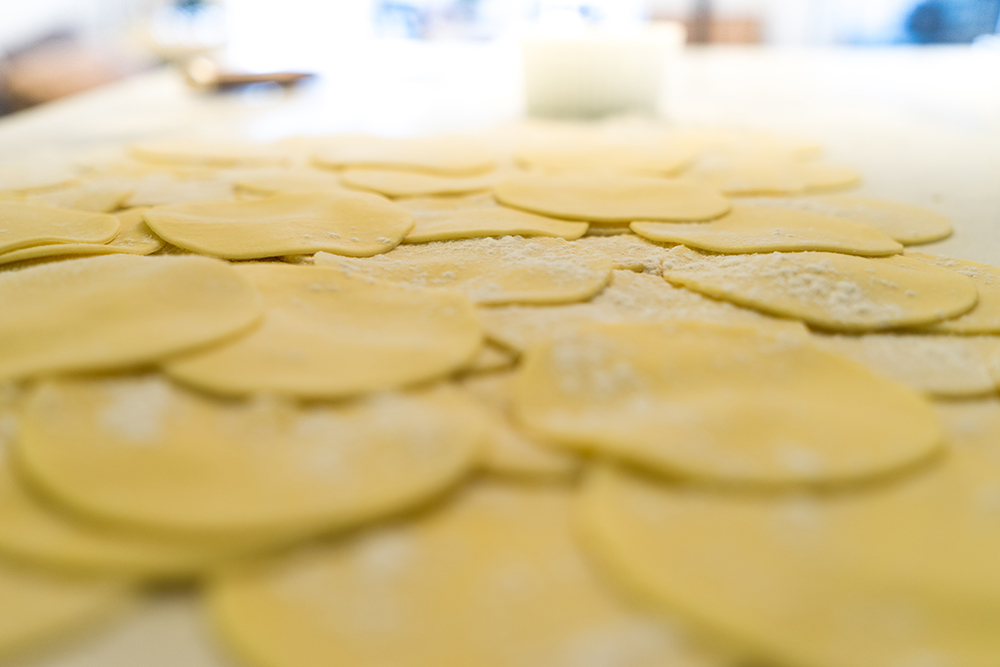
Step 4: Rolling Out Dough and Making Into Pastry Circle
(this is where our trusty ATLAS 150 CROMO by Marcato Design, came in handy. I thnk if David and I had used a rolling pin, our pierogi adventure would have taken a lot more time. So on that note, our directions here do not follow as similar to the Jamie Oliver recipe, compared to the rest of the steps)
- flour-dust a decent sized surface
- divide the dough into quarters, keeping the quarters not being used underneath a damp towel to keep them from drying out
- with the one quarter, pass it through the pasta maker on the thickest setting (0) a couple of passes
- then go down to (2) thickness once, then (4), then down to (6) (we found that the (6) setting was the right thickness for the pierogi skin)
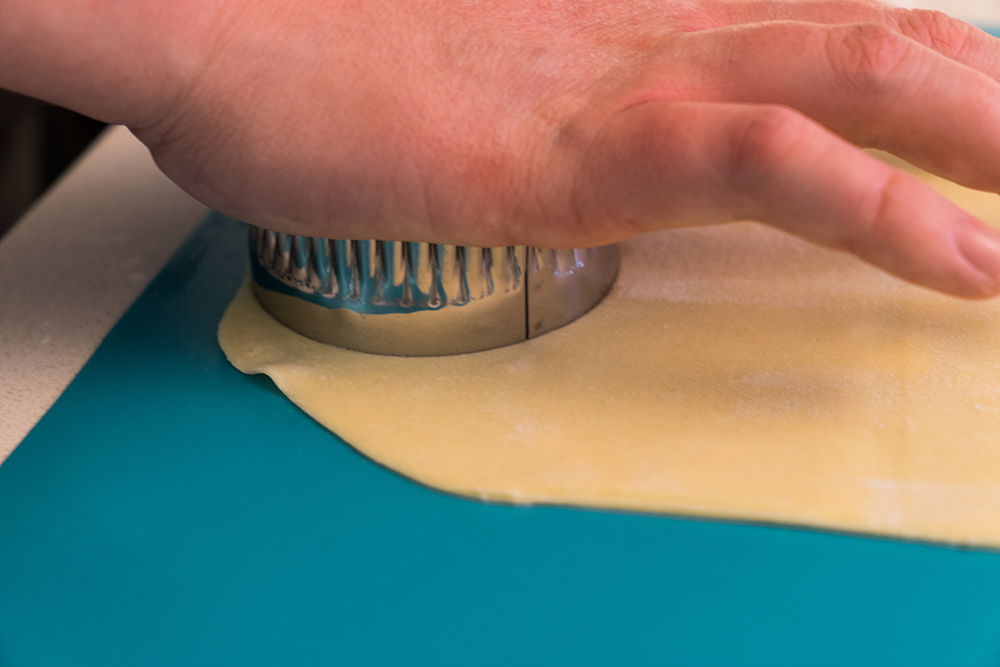
- once the strip is at the right thickness, use a 3 1/2 inch cutter and make as many pastry circles as you can on this flattened quarter of dough
- do this with each quarter of the dough and make sure to flour between layers of pastry circles to keep them from sticking together
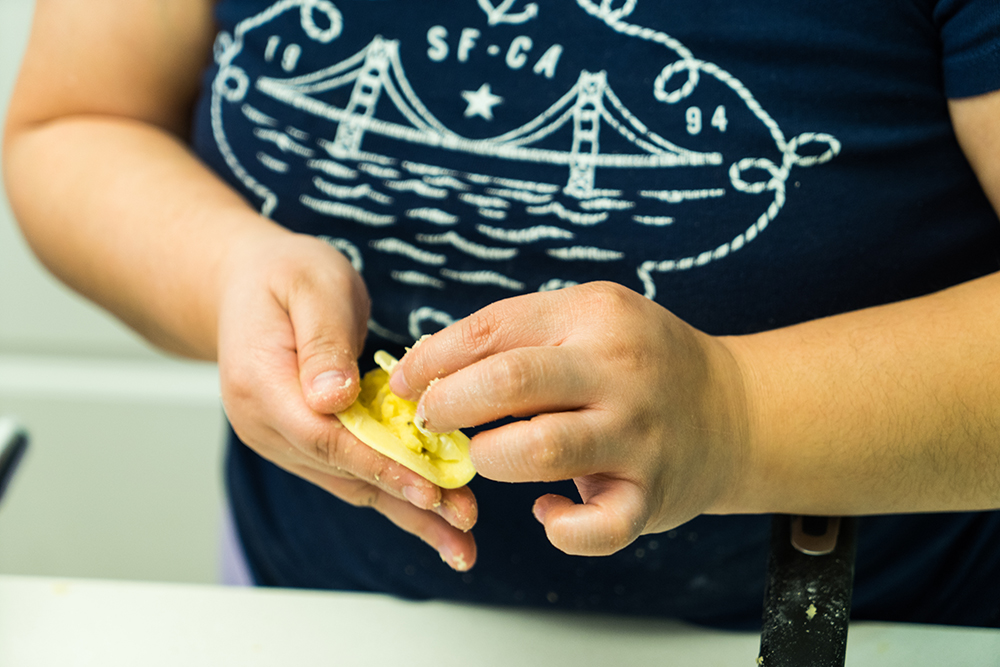
Step 5: Making the Pierogi
(David and I did this 2 different ways, mainly because I have made chinese dumplings before, and decided to make it that way, while he used a tsp to measure out his filling to the dough. Our end results definitely looked different, his looking more like pierogi and mine a dumpling)
- place a pastry circle into the palm of your hand
- put a ball of filling (around a tsp size) into the middle of the pastry circle
- gently (or forcefully in my case) fold the pastry circle in half, pinching all the way around the half-moon shape
- place finished pierogi on a flour-dusted surface
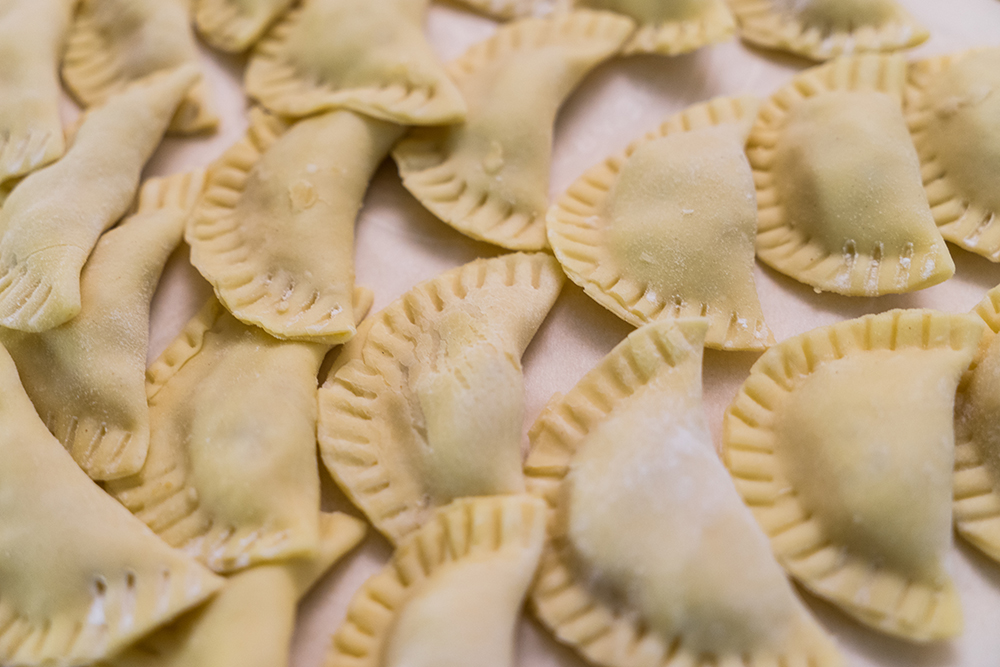
- once all the pierogies are complete, with a flour dipped fork, seal and stamp around the outer edge
Now... there's 2 directions you can go from here. You can either cook them up and gobble them, OR/AND you can freeze whatever leftovers there are.
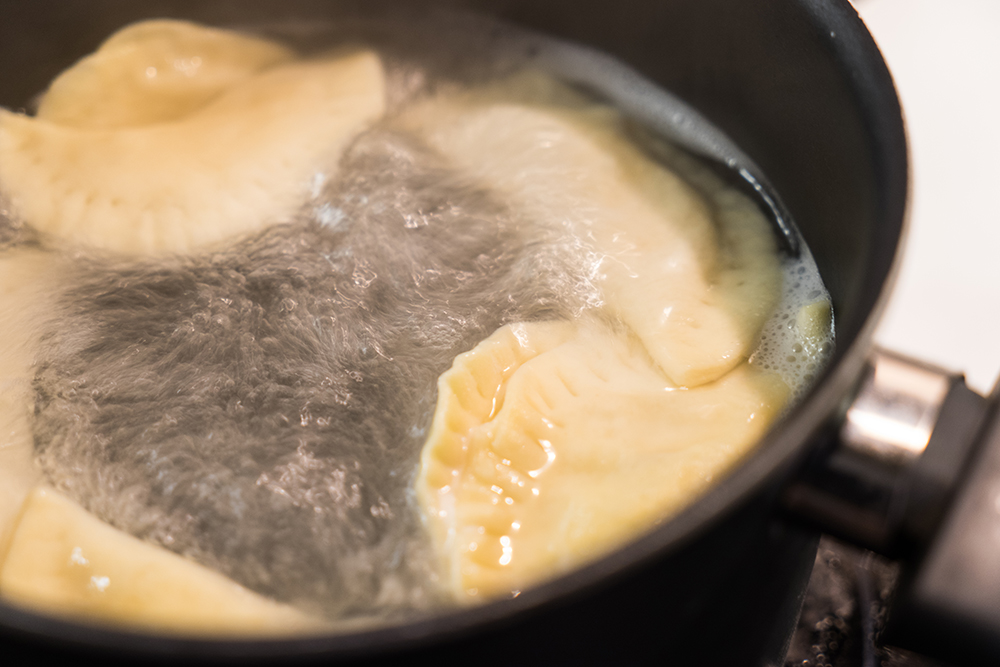
Step 6: Cooking the Pierogi
- start a large non-stick frying pan on medium heat, with a nice pat of butter, letting it foam
- while the butter is getting to the foaming stage, cook a few pierogi at a time (we did a max of 8 at a time) in a large saucepan of boiling salted water for around 4 minutes/or when they rise to the surface
- scoop out the pierogi and put them into the foaming butter in the large non-stick pan
- fry the pierogi until they are golden on one side only
- serve them on top/drizzled with the chive sour cream for dipping.
And we've finally made it to the end! It was a long process, but man is it ever tasty. it's now been a week, and we dug into our frozen packed pierogi and ate some for dinner tonight. I think we both agreed that we didn't want to make it ever again after last week... but looking back at it, I totally want to try it again and see if we can't make it even more awesome than it already is.
 - beat the 2 egss with 2/3 of the sour cream in a big bowl
- once smooth, sift in the flour, baking powder, and 1/2 tsp of sea salt
- mix the dough until it comes together
- plop the dough onto a floured surface and knead until smooth
- wrap the smooth dough ball in plastic wrap and put it in the fridge
- beat the 2 egss with 2/3 of the sour cream in a big bowl
- once smooth, sift in the flour, baking powder, and 1/2 tsp of sea salt
- mix the dough until it comes together
- plop the dough onto a floured surface and knead until smooth
- wrap the smooth dough ball in plastic wrap and put it in the fridge